Whew, it has been a long time since I have posted. I am sorry. The last year and a half have been very hard - we lost Michael's mother to cancer and Michael had gallbladder surgery. Micheal is back on his feet, we are continuing on. I also have a job now - working afternoons with ages 4-11 in private school as an after school care provider. It is going well.
I have been asked to review the pokalem and how the goofy warm thing goes together. I will put links on my eBay store page. Be sure to go ahead and join my blog so you get updates. If there is anything else you are having trouble sewing in my line of patterns, let me know!
Here is a link to my eBay store...http://stores.ebay.com/A-Stitch-Out-of-Time-Patterns
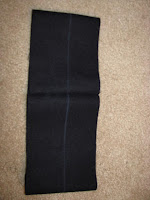
First of all, here is the layout.
Please note that the first solid line on the right is the fold, the second from the right is the edge. So, you have two layers under the ear flap/band piece and one layer under the pieces on the left.
After you cut out your pieces of wool, cut the liner piece of linen or cotton. Attach your unit number to the escutcheon (brim) in the manner you choose - stitched by hand or with a wonder under iron on material. Cut out the trim pieces as directed. At this time I press all the trim pieces in half the long way.
The trim is attached to many of the pieces next. This can be done by machine or hand - I would suggest doing a sample of each and deciding which you like. It is possible to stitch by hand and not have much of it show.
Start by applying the red trim to the escutcheon so that the folded edge shows 1/8" (.317 cm) on the right side. I pin the whole thing, clipping a bit so it goes around the corners and the curve nicely. You may want to steam it into shape. Stitch (I do it by hand) and trim the corners excess.
Apply the second piece on the back. This photo shows the front and back as it is being pinned. I have a hard time getting that tiny 1/8" to show, my pokalems usually have about 3/16" (.952 cm) showing. (Is centimeters what you on the metric system prefer?)
Stitch as before, trying to keep hand stitches small and sort of invisible. Press.
Apply the red trim to the ear flap piece in a similar manner, make small clips at corners.
Trim away excess in corners and where the buttonholes will go. Apply second piece and construct as with the escutcheon. Press. Make buttonholes where indicated. Here are these two pieces completed.
Sew red trim to the upper edge of the band. Think about it - there will be a seam here, so the
folded edge goes down. You can stitch this 1/4" away from the edge - I do it with the machine. Sew the band into a cylinder. Sew the other piece (without trim) into a cylinder.
Guess I will stop here today - the computer is acting up and will not load photos!


